Preferences
To access Preferences click on AndroidAPS to open the Overview screen, then tap the three dots on the top right of the screen and select Preferences.
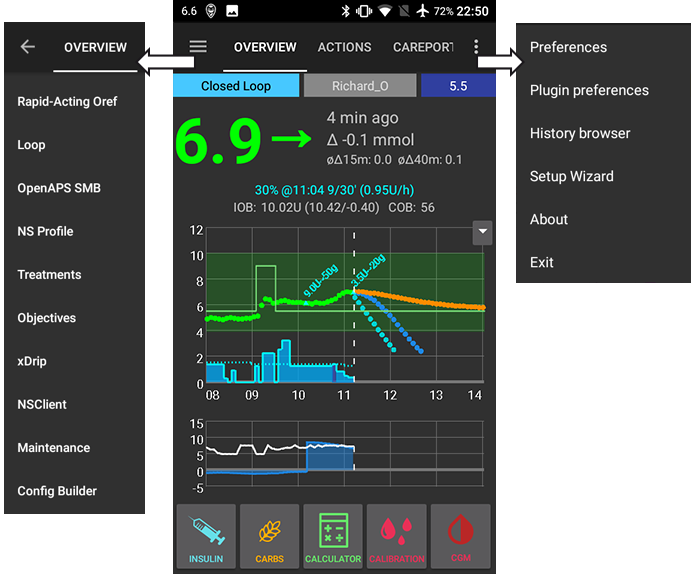
You will then be presented with the following options:
Password for settings
This allows you to set a password in order to prevent accidental or unauthorised changes to Preferences. If you set a password here you will be required to your password in order to access Preferences. To remove the password option, delete the text you have entered under the words Password for settings.
Patient age
Algorithms are different based on patient age so select Child, Teenage or Adult here.
General
- Select your language here. If your language is not available, or not all of the words translated then feel free to make some suggestions. The translation files are found here: App > Src > Main > Res > Values > Strings or ask in the gitter chatroom.
- Quick Wizard settings allows you to add a quick button for a frequent snack or meal. Enter the appropriate carb details and on the homescreen if you select the quick wizard button it will calculate and bolus for those carbs based on your current ratios (not taking into account blood glucose value or insulin on board though).
Careportal
‘Entered by’ is the text displayed in your Nightscout Careportal ‘entered by’ field. Set this to something meaningful to you, whether it is the app name, the persons name or the phone name (for example if you are using AndroidAPS as NS Client on a phone that is not the patients phone you may wish to distinguish between phone owners here).
Treatments safety
Max allowed bolus [U]
This is the maximum amount of bolus insulin that AAPS is allowed to deliver. This setting exists as a safety limit to prevent the delivery of a massive bolus due to accidental input or user error. It is recommended to set this to a sensible amount that corresponds roughly to the maximum amount of bolus insulin that you are ever likely to need for a meal or correction dose. This restriction is also applied to the results of the Bolus Calculator.
Max allowed carbs [g]
This is the maximum amount of carbs that AAPS bolus calculator is allowed to dose for. This setting exists as a safety limit to prevent the delivery of a massive bolus due to accidental input or user error. It is recommended to set this to a sensible amount that corresponds roughly to the maximum amount of carbs that you are ever likely to need for a meal.
Loop
You can toggle between open and closed looping here. Open looping means TBR suggestions are made based on your data and appear as a notification but you must manually choose to accept them and manually enter them into your pump. Closed looping means TBR suggestions are automatically sent to your pump without confirmation or input from you. The homescreen will display in the top left corner whether you are open or closed looping, and pressing and holding this homescreen button will also allow you to toggle between the two.
OpenAPS AMA
OpenAPS Advanced Meal Assist (AMA) allows the system to high-temp more quickly after a meal bolus IF you enter carbs reliably. Turn it on in the Config tab to view the safety settings here. You need to have completed Objective 7 to use this feature. You can read more about the settings and Autosens in the OpenAPS docs.
Max U/hr a Temp Basal can be set to
This setting exists as a safety limit to prevent AAPS from ever being capable of giving a dangerously high basal rate. The value is measured in units per hour (u/hr). It is advised to set this to something sensible. A good recommendation is to take the highest basal rate in your profile and multiply it by 4. For example, if the highest basal rate in your profile was 0.5u/hr you could multiply that by 4 to get a value of 2u/hr.
Maximum basal IOB OpenAPS can deliver [U]
The amount of additional basal insulin (in units) allowed to accumulate in your body, on top of your normal basal profile. Once this value is reached, AAPS will stop giving additional basal insulin until your basal Insulin on Board (IOB) has decayed to within this range again.
- This value does not consider bolus IOB, only basal.
- This value is calculated and monitored independently of your normal basal rate. It is only the additional basal insulin on top of that normal rate that is considered.
- This value is measured in insulin units (u).
When you begin looping, it is advised to set Max Basal IOB to 0 for a period of time, while you are getting used to the system. This prevents AAPS from giving any additional basal insulin at all. During this time AAPS will still be able to limit or turn off your basal insulin to help prevent hypoglycaemia.
This is an important step in order to:
- Have a period of time to safely get used to the AAPS system and monitor how it works.
- Take the opportunity to perfect your basal profile and Insulin Sensitivity Factor (ISF).
- See how AAPS limits your basal insulin to prevent hypoglycaemia.
When you feel comfortable, you can allow the system to start giving you additional basal insulin, by raising the Max Basal IOB value. The recommended guideline for this is to take the highest basal rate in your profile and multiply it by 3. For example, if the highest basal rate in your profile was 0.5u/hr you could multiply that by 3 to get a value of 1.5u.
You can start conservatively with this value and increase it slowly over time.
These are guidelines only; everyone’s body is different. You may find you need more or less than what is recommended here, but always start conservatively and adjust slowly.
Note: As a safety feature, Max Basal IOB is hard-limited to 7u.
Absorption Settings
If you have selected to use AMA Autosense then you will be able to enter your maximum meal absorption time and how frequently you want Autosense to refresh. If you often eat high fat or protein meals you will need to increase your meal absorption time.
Pump settings
The options here will vary depending on which pump driver you have selected in ‘Config Builder’. Pair and set your pump up according to the DanaR Insulin Pump or DanaRS Insulin Pump or Accu Chek Combo Pump instructions where relevant. If using AndroidAPS to open loop then make sure you have selected Virtual Pump in config builder.
NS Client
- Set your Nightscout URL here (e.g. https://yourwebsitename.Herokuapp.com or https://yourwebsitename.Azurewebsites.net), and the ‘API secret’ (a 12 character password recorded in your Heroku or Azure variables). This enables data to be read and written between both the Nightscout website and AndroidAPS. Double check for typos here if you are stuck in Objective 1.
- ‘Log app start to Nightscout’ will record a note in your Careportal entries every time the app is started. The app should not need to start more than once a day, more frequently than this suggests a problem.
- ‘Enable local broadcasts’ will share your Careportal data to other apps on the phone such as xdrip.
- ‘Alarm options’ allows you to select which default Nightscout alarms to use through the app. For the alarms to sound you need to set the Urgent High, High, Low and Urgent Low alarm values in your Heroku or Azure variables. They will only work whilst you have a connection to Nightscout and are intended for parent/carers, if you have the CGM source on your phone then use those alarms instead (e.g. xDrip+)
SMS Communicator
This setting allows remote control of the app by texting instructions to the patient’s phone which the app will follow such as suspending loop, or bolusing. Further information is described in SMS Commands but it will only display in Preferences if you have selected this option in the Config Builder.
Other
- You can set defaults for your temp targets here, for the different types of temp target (eating soon and activity). When you select a temp target then if you choose for example “Eating Soon” from the drop down box, it will automatically populate the duration and value for you based on the figures you provided here. For more information on use of Temp Targets see [[Open APS features]].
- You can set default prime amounts - this will prime the pump the value specified and this insulin is counted as used from the reservoir but not counted in IOB calculations. See the instruction booklet in your cannula box for how many units should be primed depending on needle length and tubing length.
- You can change the display on the homescreen and watch for the values that are in range. Note that this is just how the graphs look and doesn’t impact on your target or calculations.
- ‘Shorten tab titles’ allows you to see more tab titles on screen, for example the ‘Open APS’ tab becomes ‘OAPS’, ‘Objectives’ becomes ‘Obj’ etc.
- ‘Local Alerts’ lets you decide if you receive a warning and after how long for not receiving blood glucose values (stale data) or the pump being unreachable. If you frequently get pump unreachable alerts then enable BT Watchdog in the Advanced Settings.
Advanced Settings ``requires more work
- OpenAPS MA
- Always use short average delta instead of… Enabling this setting is useful when you are using data from unfiltered sources such as xDrip+, as opposed to filtered sources such as an official Dexcom Receiver. Filtered data appears to be smooth, whereas unfiltered data can appear to be jumpy. This unfiltered data could cause AndroidAPS to apply Temporary Basal Rate changes more frequently than are really needed, as the OpenAPS algorithm reacts to the jumpy data. With this setting enabled, the OpenAPS algorithm will use the Short Average Delta (the average change in blood glucose over the past 15 minutes) instead of the last blood glucose reading received. This effectively has a “smoothing” effect on the data and attempts to compensate for any jumpy readings. Users of Abbot Freestyle Libre sensors collecting their glucose data via devices such as LimiTTers may find this setting provides better results with AAPS.
For further tips regarding data smoothing when using xDrip+ as the data source, see Smoothing Blood Glucose Data in xDrip+.
- OpenAPS preferences.json - before changing any of these settings, please view the descriptions of the safety values used and why in the OpenAPS docs.
- ‘Ignore profile switch events’ will not send your current AndroidAPS profile to the pump. It is encouraged not to select this unless you are testing code, as for safety sending profile switch events to the pump’s basal profile 1 means than should AndroidAPS stop working or loose connection with the pump then your pump will revert to the same profile as default rather than you having to manually enter it into the pump. For more information on profiles see Profiles.
- ‘BT Watchdog’ select this option if you keep loosing connection with your pump. When the pump looses connection it will toggle bluetooth off and on for you to improve the connection.
Wear Settings
For more information on the wear watchface settings see Watchfaces.